
Glass railing hardware tightening is one of the most critical maintenance tasks a homeowner can perform, and doing it incorrectly is one of the leading causes of panel failure. Whether you have a spigot system, standoff mounts, or a base channel setup, keeping your glass rail hardware properly torqued protects both the glass and everyone relying on the railing for safety. This guide covers what you need to know about tightening hardware correctly, when to act, and how to avoid costly mistakes.
Table of Contents
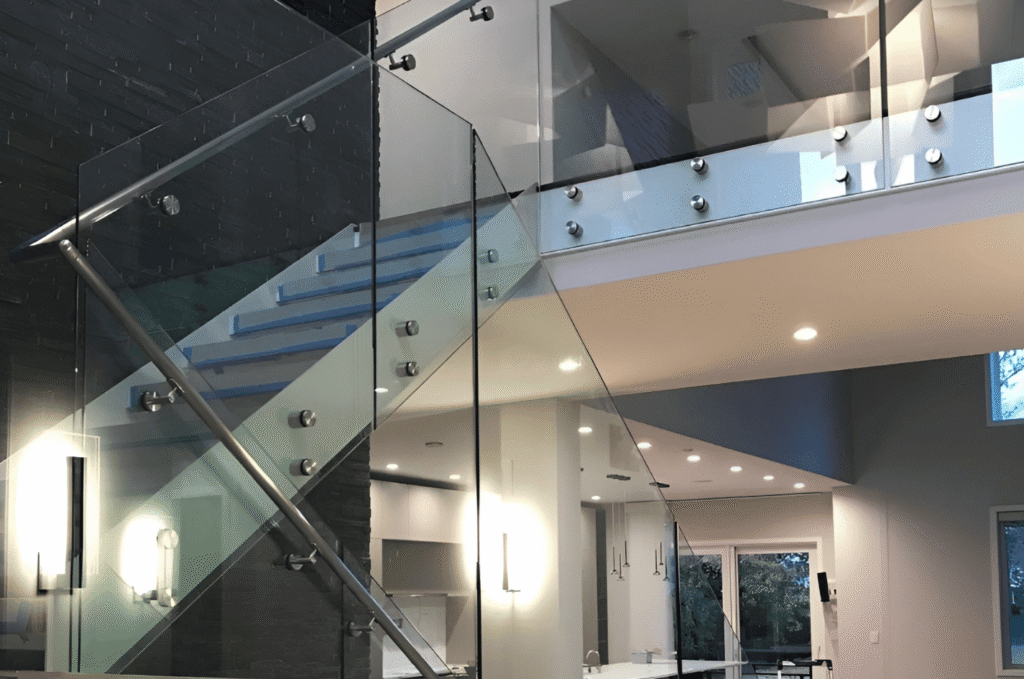
Why Glass Railing Hardware Tightening Is a Safety Issue
Loose hardware is not just a cosmetic problem. Even small shifts under wind load or daily use generate stress that can cause glass fractures over time. Getting this balance right is the foundation of good glass railing hardware tightening practice.
Glass panels are precision products engineered to handle distributed loads, not point pressure from uneven clamping. When hardware is too loose, panels shift. When overtightened, point-loading introduces stress that can cause spontaneous cracking days or even weeks later.
The Danger of Over-Tightening
Applying too much force to clamps, spigots, or standoffs compresses the glass unevenly and creates stress concentrations at the hardware contact points. These stress points are invisible but progressive, and the damage builds until the panel cracks without warning.
Always use a torque wrench rather than a standard wrench or power tool. The recommended torque for most spigot and standoff systems falls between 8 and 10 Nm. If you are unsure which specification applies, a glass railing Redmond professional can assess your setup and confirm the correct values.
Gaskets and Bushings Are Non-Negotiable
Gaskets, rubber bushings, and neoprene spacers exist to prevent direct metal-to-glass contact. When frameless glass railing hardware clamps or standoff pins touch the glass without a buffer, they create hard stress points that compromise the panel’s structural integrity.
Before tightening any hardware, confirm that all gaskets are in place and seated correctly. If a gasket looks compressed or cracked, replace it before re-tightening. For a full overview of routine care, our glass railing maintenance guide covers gasket inspection, cleaning, and annual checks in one place.
The Correct Tightening Sequence for Glass Rail Hardware
The sequence in which you tighten glass rail hardware matters as much as the torque value. Tightening bolts out of order creates uneven clamping pressure across the panel face, leading to the same stress problems as overtightening.
A structured approach ensures even load distribution and keeps the panel properly aligned. Skipping this step is one of the most common errors during both initial installation and routine glass railing hardware tightening.
Finger-Tighten Before Applying Torque
Start by finger-tightening all hardware caps on a panel before applying any torque. This seats the gaskets evenly and positions the glass correctly within the mount. Once all caps are finger-tight, check the panel with a spirit level and adjust if needed before proceeding.
Correcting alignment after torque has been applied means loosening everything and starting over. If nearby renovation or landscaping work is coming up, read our guide on protecting glass railings so hardware stays undamaged during the process.
Tighten Top Row First, Then Bottom
After confirming the panel is plumb, tighten the top row of bolts from one side to the other, then repeat the same sequence for the bottom row. This applies pressure evenly across both faces of the glass and prevents the panel from racking inside the mount.
For glass stair railing hardware, pay extra attention to panels at transitions and corners, where angled loads create higher stress. Pairing hardware tightening with a seasonal cleaning schedule makes it easy to inspect and clean in the same visit each year.
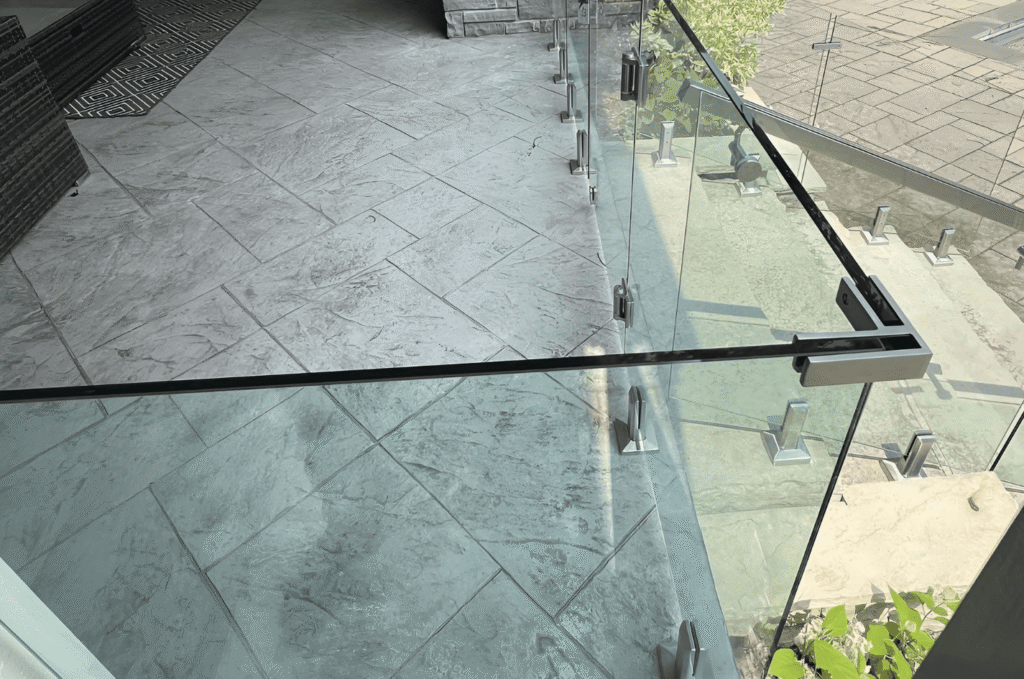
How Often to Schedule Glass Railing Hardware Tightening
Thermal expansion, vibration from wind, and seasonal movement all cause hardware to work loose over time. For most residential installations in the Pacific Northwest, a thorough hardware check once a year is the minimum. Properties with elevated decks or high foot traffic should be checked twice a year.
What to Check During Each Inspection
During your annual glass railing hardware tightening visit, start at the base. Confirm that all posts, spigots, and base shoe channels are firmly anchored. Give each post a firm push in multiple directions. Any movement indicates that anchor bolts may be loose or the substrate beneath has shifted.
If a bolt spins freely without tightening, the threads are stripped and the hardware needs replacement rather than retightening. For more on what to inspect before and after installation, our property preparation guide is a useful reference for understanding how substrate condition affects long-term hardware performance.
Seasonal Checks for Outdoor Systems
After a heavy storm season or cold winter, do a visual pass of the entire railing before relying on it. Look for water pooling around base channels, rust staining near hardware, and any cracking or lifting of sealant around anchor points.
These are early warning signs that need attention before hardware loosening becomes a safety issue. Homeowners in Magnolia dealing with consistent wet weather exposure can request a seasonal check from our glass railing Magnolia team to stay ahead of potential problems.
Substrate Problems That Keep Hardware Loose
Hardware that keeps loosening after repeated tightening is almost always a symptom of a substrate problem, not a hardware problem. The deck framing, concrete, or floor structure beneath the railing must be structurally sound for any torque to hold.
Homeowners in Bellevue with elevated concrete balconies frequently encounter epoxy anchor failures. Our glass railing Bellevue team can perform a substrate assessment before any re-anchoring work begins.
Wood Decks and Blocked Framing
If anchor bolts on a wood-framed deck continue to loosen after tightening, inspect the wood beneath the base plate for soft spots or spongy texture. These indicate moisture intrusion or rot that has undermined the mounting location. Tightening into compromised wood provides only temporary stability.
The correct fix is to add new blocking or replace the affected framing section before re-anchoring the hardware. Our glass railing Laurelhurst team assesses substrate conditions as part of every maintenance and reinstallation project in the area.
Concrete and Epoxy Anchor Failures
For concrete-mounted frameless glass railing hardware, loose bolts typically mean the epoxy chemical anchor has failed. Re-anchoring requires cleaning the existing hole and applying fresh structural epoxy. Standard construction adhesive is not a substitute and will not hold under load.
This task requires correct cure time before the railing is returned to service. Our Seattle railing service team handles anchor repairs and full hardware inspections across all system types throughout the region.

Ready to Get Your Hardware Inspected?
Glass railing hardware tightening done correctly keeps your system safe, extends the life of the glass, and prevents failures that require full panel replacement. From correct torque values to substrate checks, every step in this process matters.
Learn More About Our Services
Our team works with homeowners across Seattle and the Eastside to keep glass railing systems safe and performing at their best. Explore our full range of installation and maintenance services at Glass Railing Seattle.
Get in Touch Today
If you are unsure whether your railing needs a professional inspection or a full maintenance visit, contact our team and we will help you figure out exactly what your system needs.