Proper glass railing hardware installation determines if your railing system performs safely for decades or fails prematurely. Each step in this blog will help you to achieve professional results.
You will learn how to install glass railing hardware correctly. From preparation to final inspection, these ten steps cover everything you need to know about glass railing hardware installation for both interior and exterior applications.
Table of Contents
Glass Railing Hardware Types
Before starting any glass railing hardware installation, you need to understand the different hardware systems available in different areas. For example, your choice of glass rail hardware in Issaquah affects installation methods, final appearance, and long-term performance.
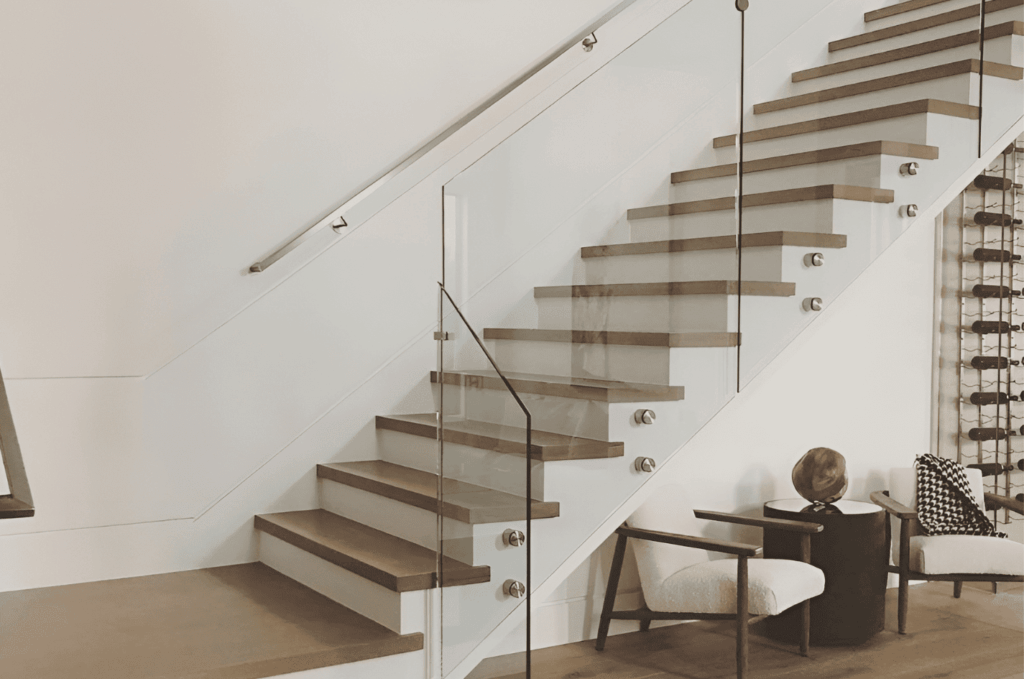
Glass railing hardware stainless steel components dominate the market for good reason. Stainless steel grades 304 and 316 resist corrosion and maintain strength through years of use. For coastal or harsh environments in Medina & Clyde Hill, marine-grade 316 stainless steel offers superior protection.
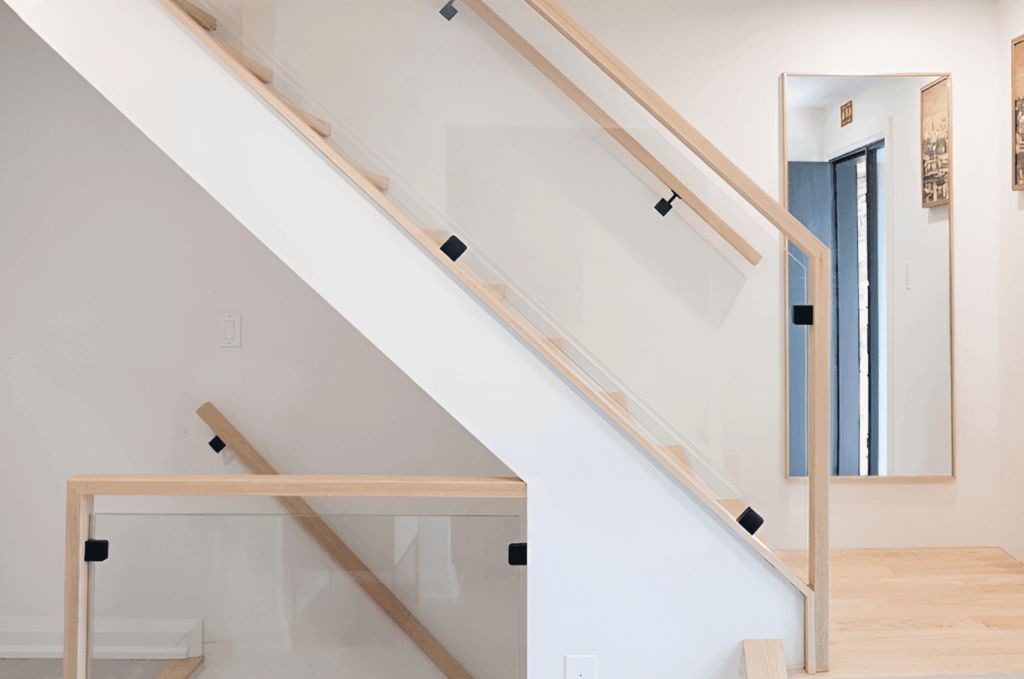
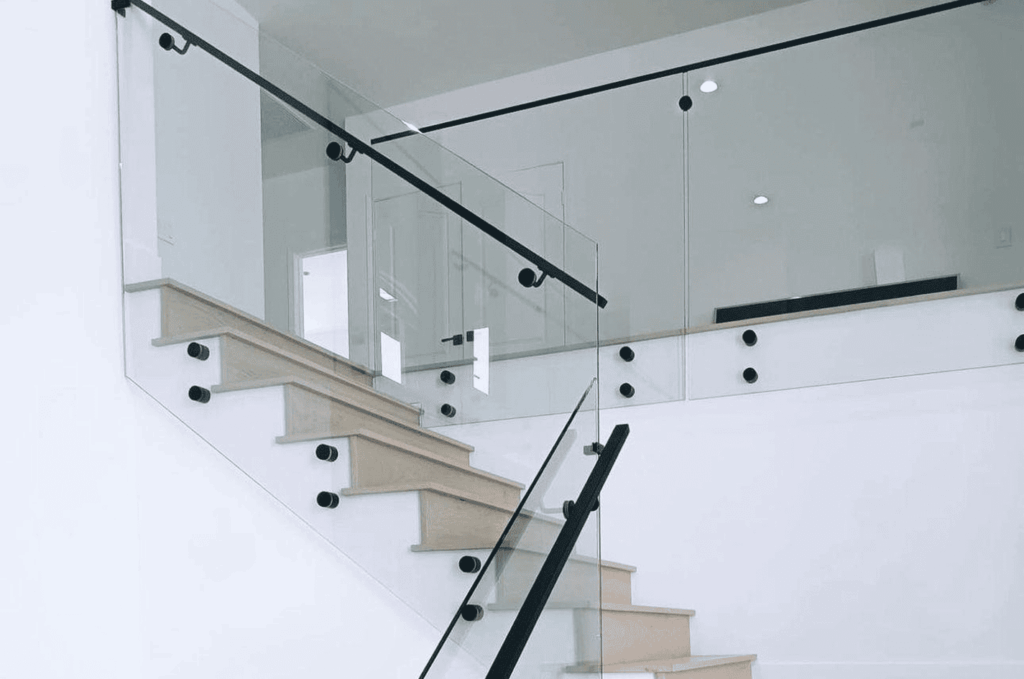
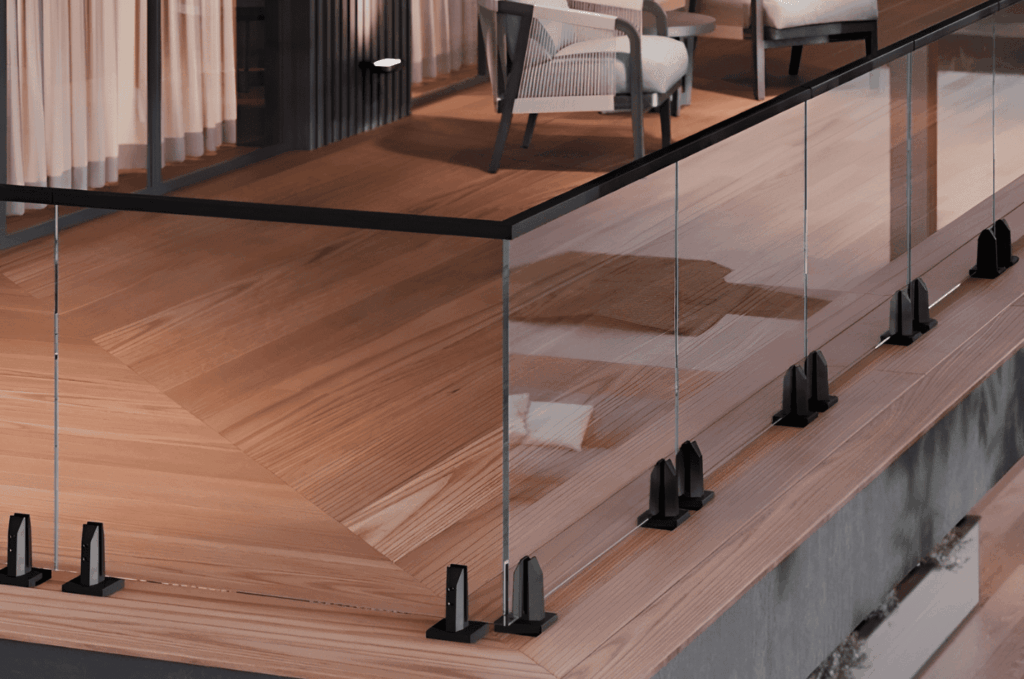
Common glass railing mounting hardware includes base shoes, standoff clamps, spigots, and post-and-clamp systems. Frameless glass railing hardware creates minimal visual impact by hiding most mounting components. Each type requires specific installation techniques covered in the steps below. Glass deck railing hardware must withstand outdoor conditions including Edmonds’ rain, UV exposure, and temperature changes. Interior installations allow more flexibility in material choices.
Step 1: Gather Your Glass Railing Hardware and Tools
Successful glass railing hardware installation starts with proper preparation. Gather all glass rail hardware components before beginning. Verify that you have every piece listed in your system’s packing list. Missing hardware delays projects and compromises safety.
Essential tools for installing glass railing hardware include a drill with masonry and metal bits, level, measuring tape, marking pencil, wrench set, rubber mallet, and safety equipment. Glass deck railing hardware installations also require appropriate anchors for your mounting surface.
Step 2: Measure and Plan Your Layout
Accurate measurements prevent costly mistakes during glass railing hardware installation. Measure the total linear footage of your railing run. Note corners, angles, and any obstacles that affect hardware placement.
Mark post or mounting hardware locations along your railing path. For glass deck railing hardware, position mounts 1 to 2 inches from the deck edge to ensure screws anchor into solid framing. Create a layout diagram showing each piece of glass railing mounting hardware and its precise position.
Step 3: Prepare the Mounting Surface
Clean and level mounting surfaces before installing glass railing hardware. Remove debris, old fasteners, and any obstructions. For concrete surfaces, check for cracks that could compromise anchor strength. Wood surfaces should be solid with no rot or damage.
Surface preparation matters more for frameless glass railing hardware systems where minor imperfections become visible. Use a level to identify any slopes or variations that require adjustment during installation.
Step 4: Install Base Shoe or Post Anchors
This critical glass railing hardware installation step establishes your system’s foundation. For base shoe systems, position the aluminum channel along your marked line. Pre-drill anchor holes using the appropriate bit for your surface material.
Post-mounted glass rail hardware in Bothell requires secure anchor plates. Position each plate at marked locations and drill pilot holes. Use appropriate anchors for concrete, wood, or composite surfaces. Tighten anchors evenly to prevent warping the base plate.
Step 5: Mount Glass Railing Hardware Stainless Steel Posts or Standoffs
With anchors secured, attach your glass railing hardware stainless steel posts or standoffs. For post systems, slide posts onto base plates and secure with set screws. Verify each post is plumb using a level before fully tightening.
Standoff glass railing mounting hardware requires precise hole alignment. Position standoffs at marked locations on the mounting surface. Secure each standoff firmly, ensuring it sits perfectly perpendicular to the surface. Adjustable standoffs allow fine-tuning during glass panel installation.
Step 6: Check Alignment and Level
Before installing glass panels, verify all glass railing hardware alignment. Use a string line across post tops or along base shoe channels to identify any high or low spots. Consistent height across your glass rail hardware ensures panels fit properly.
This step prevents problems discovered only after glass installation. Make adjustments now while access remains easy. Proper alignment during glass railing hardware installation saves time and prevents panel damage.
Step 7: Prepare Glass Panels for Installation
Clean glass panel edges before installation. Remove protective film from areas that will contact glass railing mounting hardware. Inspect each panel for chips, cracks, or defects that could compromise safety.
For standoff systems, verify that pre-drilled holes in the glass align with your mounted standoffs. Frameless glass railing hardware requires precise hole placement. Any misalignment creates installation difficulties and potential safety issues.
Step 8: Install Glass Panels with Mounting Hardware
Glass panel installation requires two people for safety. Carefully position each panel into the glass railing hardware. For base shoe systems, slide panels into the channel and secure with setting blocks and sealant.
Post and clamp systems require sliding glass into position and securing clamps at specified torque settings. Standoff installations involve aligning pre-drilled glass holes with mounted standoffs and securing with cap nuts. Never overtighten glass railing hardware stainless steel components against glass panels.
Step 9: Add Cap Rails and Finishing Hardware
Cap rails provide finished appearance and additional stability for some glass railing hardware systems. Position rubber gaskets along glass panel tops before setting cap rails. Press cap rails firmly onto gaskets to create weather-tight seals.
Install end caps, corner fittings, and any decorative glass rail hardware elements. These finishing touches complete your professional-looking installation and protect hardware from weather exposure.
Step 10: Final Inspection and Cleanup
Inspect every component of your completed glass railing hardware installation. Check that all fasteners are properly tightened. Verify panels are secure and level. Test stability by applying gentle pressure at multiple points along the railing.
Clean glass panels with appropriate glass cleaner to remove fingerprints and installation residue. Wipe down all glass railing hardware stainless steel components. Remove protective coverings from any remaining surfaces.
Professional Glass Railing Hardware Installation
Complex layouts, curved sections, and commercial applications often require specialized knowledge. Professionals understand local codes and ensure your glass railing mounting hardware meets all safety requirements.
Improper glass railing hardware installation creates safety hazards and may void warranties. Consult with Glass Railing Seattle’s experienced installers who work with frameless glass railing hardware daily. Our expertise ensures your investment delivers lasting beauty and reliable performance for years to come.
Quality glass railing hardware combined with proper installation creates stunning results that last for decades. If you want professional results, contact us today for consultation.